
Every Silent Hill: Townfall puzzle, solved step by step
19 puzzles that take more than typing a number, in the order you reach them. Each one starts with where the game hides the answer, so you can stop reading there and solve it yourself. The 26 plain number locks are on the codes page.
Can the game help instead?
Yes. The puzzle setting has a Hinted option, and Game Rant’s guide to the settings says that on it “key text and clues are shown in red”. It can be changed at any time under Game Options, and it does not change any answer on this page. Said in Game Rant: difficulty and puzzle settings
Part 1: Arrival
The power panel in Zoe's house
Chapter 3 · Zoe's house, the crawlspace beside the stairs
Clue first: The Power Card Credit Guide, in the same crawlspace; the flashlight shows it.
- Put the prepaid power card into the slot under the display.
- Press A until the screen shows the card's credit.
- Press B, then throw the main switch at the bottom right.
Tuning a radio with the CRTV
Chapter 4 · First at the radio in the pharmacy's back room, then at radios through the rest of the game
Clue first: The on-screen prompts; there is nothing to read, only two things to line up.
- Hold the CRTV up to the radio. First steady the picture: tilt until the colours stop drifting and the two circles sit on top of each other.
- Then pick each colour in turn and move its shape into its box. The signal locks when every shape fits.
- On PS5 the tilt uses the controller's motion sensor. If that fights you, the control options can switch the motion controls off and let the right stick do it.
- Every radio signal, this first one included, counts toward a trophy; all of them are listed in the collectibles checklist.
The scales at the clinic
Chapter 4 · Shorefront Family Clinic, the back room at the end of the hallway
Clue first: The underlined lines on the paper beside the scales, one for each item.
- Collect the three items: Zoe's lanyard from the organ box in her kitchen, the dosage error note from the pharmacy locker, and the broken stethoscope from the bed in Jess's house.
- Jess's front door stays locked. The back door key is with a neighbour in the apartment building opposite, upstairs on the right, on the living room table.
- Left pan: the broken stethoscope. Middle pan: the dosage error note. Right pan: Zoe's lanyard.
Part 2: Zoe
Dr. Glenn's questions on the phone
Chapter 5 · The phone booth down the street from the medical centre
Clue first: The medical security note gives the number to dial.
- Dial 496 0556.
- Answer the four questions with 3, then 2, then 2, then 1.
Part 3: The Patient
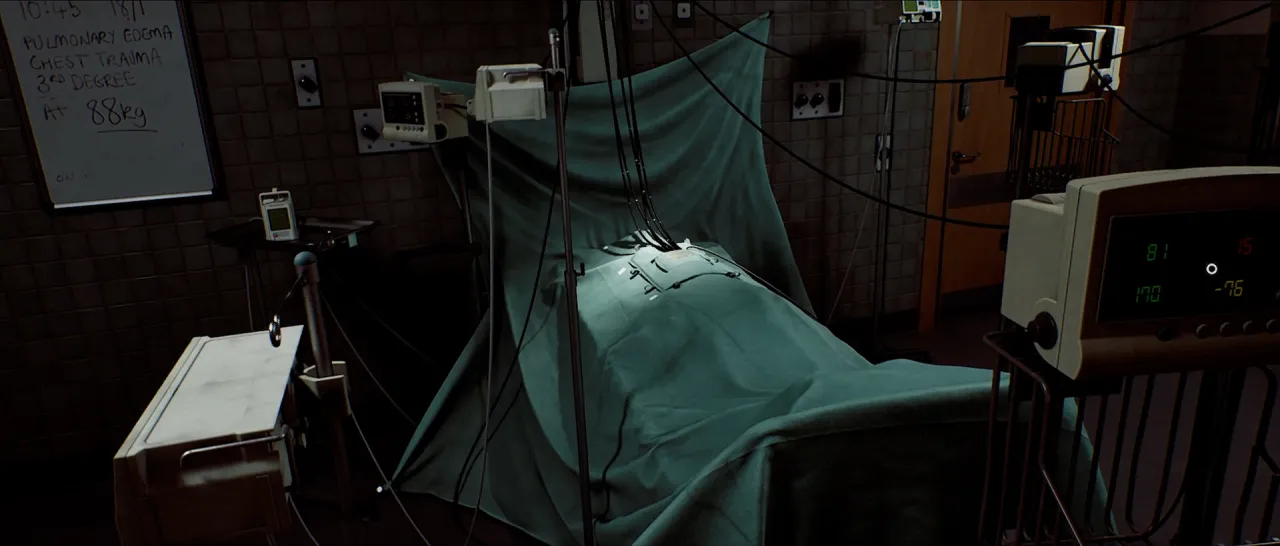
The patient's vitals
Chapter 7 · St. Amelia Medical Center, surgery
Clue first: The laptop to the left of the bed says which readings to ignore.
- Blood pressure is the green reading: answer 70 systolic and 40 diastolic.
- Pulse is the yellow reading on the monitor at the foot of the bed: about 160.
- Blood oxygen is the red reading: 80%.
- A wrong answer costs health, so check the monitor before you reply.
Where the guides differ. The yellow pulse number wobbles. Guides print 160, 161 and 162 for the same monitor; pick the one that reads about 160.
5 guides print this: PowerPyx · Game Rant · Polygon · VGC · TheGamer
The two X-rays
Chapter 7 · St. Amelia Medical Center, the X-ray room behind the surgery (door code 7103, from the pager)
Clue first: The X-ray dosage table on the laptop by the bed.
- Turn on the computer and move the camera until the screen reads that the skull is aligned.
- On the panel: power on, site Skull, kV 3, mA 7, time 1. Press the green button.
- Move the camera down to the chest the same way, then set site Chest, kV 7, mA 3, time 1.2 and press the green button.
The infusion pumps
Chapter 7 · St. Amelia Medical Center, surgery
Clue first: The medication dosage table on the laptop, read in the column for the patient's weight on the whiteboard, 88 kg.
- For each pump press SET RATE, enter the number, confirm with the tick and press READY PUMP.
- Dextracyclate 15, Hydroxaline 7, Tensobromide 8.
- Start them from the small console on the left of the bed.
Intubating the patient
Chapter 7 · St. Amelia Medical Center, surgery; the kit is in the basement storage room
Clue first: Dr. Glenn gives the storage number, 5353, for the phone at reception.
- Call 5353 from reception, take the lift to the basement and pick up the kit in the storage room.
- Back at the bed, move the cursor until the spot turns red and throbs, then hold the trigger (R2 or RT).
- PowerPyx gives the order as the right side, then the lower left, then the top.
Two valves after the gates close
Chapter 8 · The altered medical center, rooms 05 and 10
Clue first: Picking up Matthew Clark's blood bag shuts the gates; the valves open them again.
- Turn the valve in room 05.
- Turn the valve in room 10, then climb out.
The blood bags on the walls
Chapter 8 · The altered medical center, the central room
Clue first: Each slot has a patient assessment; each bag's description matches one of them.
- Collect the bags first. Zoe's patient list, in the first room with a bag, marks where the others are.
- Sarah Watson's bag and then Matthew Clark's go on the left wall, in that order; George McEwan's goes on the right wall.
- Then pull the switch beside the back double doors, on their left side.
Where the guides differ. Guides count the slots differently (first and second on the left, or second and third), but they agree on which wall and which order.
The Ordell transfusion door
Chapter 8 · The altered medical center, behind the first door
Clue first: Simon's blood type is on the medical wristband in your equipment; the bags on the walls carry theirs.
- Only four blood types can go to the centre: O-, O+, A- and A+.
- Spin the circles until straight lines join the centre to T.F., H.M. and S.W.
- Press the ORDELL button in the middle.
Part 4: Clara Woods
The floppy disks at 5 South Brae
Chapter 10 · Clara Woods, 5 South Brae, the computer upstairs
Clue first: The Fix-A-Disk software from Atlas Computers and three numbered disks.
- Put in the Fix-A-Disk floppy and wait for the screen to ask for a disk to scan. Back out without cancelling and take it out.
- Put in disk 2 of 3 and choose Repair Volume.
- Then put in disks 1, 2 and 3 in order, confirming the unzip. Turn on the printer and print MANUAL.EML.
- The printout holds the number for the safe beside the computer; it is on the codes page.
The tapes at 5 Upper Brae
Chapter 10 · Clara Woods, 5 Upper Brae
Clue first: Four tapes around the house, Today, Yesterday, Tomorrow and Do Not Play, and the Current Count file.
- Play the tapes you find in the house; one of them, with the back door key from the kitchen, leads outside to a disk.
- Switch to the tape called Today before you open the safe on the table.
- The safe's number sits between the two numbers the notes in the Current Count file give; it is on the codes page.
Part 5: Richard
The generator outside CEG HQ
Chapter 12 · CEG HQ, the fenced yard outside, reached through the fire exit
Clue first: Three lights on the panel show which lines fail.
- The generator key is in a small cabinet in the manager's office.
- At the back of the generator, turn on only the right-hand pump; leave the left and middle off.
- At the front, put the key in the panel and pull the red lever.
Where the guides differ. Guides describe the right-hand switch differently, as diagonal or as facing down. All three agree it is the only one of the three left on.
The projector and its slides
Chapter 13 · CEG HQ, the boardroom on the fifth floor
Clue first: The meeting agenda the projector shows, and the picture on each slide when held to the light.
- The bulb is in the general storage cabinet in the media department storeroom. The lens is in the CFO's desk in Finance on the third floor, whose door code is on the codes page.
- Put in the bulb, then the lens, and press the red switch.
- The slides are in The Gallery meeting room. Load them in agenda order: D, F, B, C, E, A. Press play.
4 guides print this: PowerPyx · Game Rant · Polygon · Eurogamer
Part 6: Simon
The flare stack
Chapter 14 · The altered CEG HQ, the alarm panel by the red clamp wheel
Clue first: The reference sheet: its alarm code, and the clamp release code circled at the top.
- Unlock the buttons with the controller key from the second floor. Enter the two codes on the codes page, one on each panel.
- Press Gas Flow. Then go up floor by floor and turn the middle tower so the red pipe runs unbroken to the top.
- Floor 1: two turns. Floor 2: one turn left. Floor 3: two turns. Floor 4: two turns.
- Back on the ground floor press Flow Test, check that every light is green, then IGNITE.
Where the guides differ. Game Rant and IGN press Gas Flow before turning the floors; PowerPyx turns the floors first and presses Gas Flow after. Every guide ends with Flow Test and IGNITE.
The water plant command console
Chapter 15 · The altered SWDP, the control room
Clue first: Each console printout names an order. Most machine numbers are painted on the machines and show on the CCTV cameras; the aux line numbers are on the paper beside the console, and 592 is the number above the door to the valve room.
- Turn the console on with its two switches. Every command is a verb button, a machine button and the machine's number, then ENTER.
- Open Valve B: 254. Start Filter A: 103.
- The printout then gives a locker code, on the codes page; the key inside opens the auxiliary lines upstairs.
- After the auxiliary lines: flush Aux Line B, 246. Stop the regulator, 781. Unlock the door to the valve room, 592.
- Go down and turn Valve F by hand, then come back up.
Where the guides differ. PowerPyx prints 245 and 130 for the first two, where Game Rant, Eurogamer and IGN print 254 and 103. For the regulator, PowerPyx, IGN and Eurogamer's own description read 781, while Game Rant prints 178 and Eurogamer's input step says 782. The camera shows the number painted on each of those machines, so read it there if yours differs.
The auxiliary line switches
Chapter 15 · The altered SWDP, the AUX room
Clue first: The Auxiliary Lines sheet shows each line's switch directions.
- The painted stripes beside each switch say which line it belongs to: one, two or three.
- Set each switch to the position the Auxiliary Lines sheet gives for its line; painted arrows on the wall show which way the pipes run. A line's light turns green when all its switches are right.
- Lines 1 and 2 start from the wall that faces away from the computer.
The clamp release panel
Chapter 15 · The altered SWDP, the panel opposite the command console
Clue first: The clamp release procedure document, and the letter and number stencilled on the clamp arms.
- Balance: Intermediate on both. Both notify switches on. Run off: disengaged.
- Clamp connection: D71. Report switches 1, 3 and 6 on.
- Pressure control: SET. Intubate flow: NONE. Battery one to B, battery two to C.
- When the release button flashes green, press it, then turn the red crank below.
After the last puzzle
Where each chapter falls, and which ones to save in before the endings, is on the chapters page. Every radio signal, and the rest of the collectibles, is in the checklist on the collectibles page, and how to slip past the enemies between puzzles is on the stealth page. Some trophies count things you pass on the way, such as documents and signals on the handheld television; they are on the trophies page, and what the handheld television does is on the CRTV page.